Red Velvet Cake
Classic Red Velvet Cake with cream cheese frosting - moist, tender layers with subtle cocoa flavor and signature red color. Perfect for special occasions!
 By
5 views
By
5 views
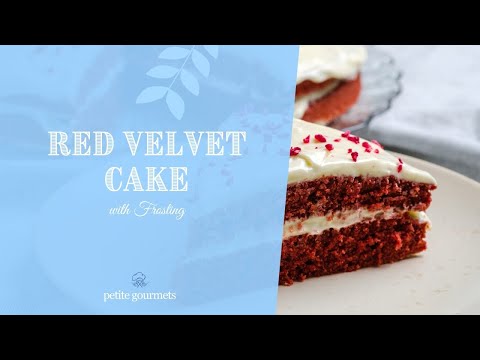
This classic Red Velvet Cake combines the perfect balance of subtle cocoa flavor, tender crumb, and striking red color that makes it a showstopper for any special occasion. The cake's signature velvety texture comes from the unique combination of buttermilk, vinegar, and cocoa powder, creating a moist and tender cake that melts in your mouth.
Topped with rich, tangy cream cheese frosting, this Red Velvet Cake delivers the perfect contrast of flavors - slightly acidic cake layers paired with sweet, creamy frosting. Whether you're celebrating a birthday, anniversary, or holiday, this timeless American dessert is sure to impress with its beautiful presentation and irresistible taste.
Recipe Video
Ingredients
13 itemsInstructions
-
Prepare for baking
Preheat oven to 175°C (350°F). Grease two 9-inch round cake pans with butter and dust lightly with flour, tapping out any excess.
-
Mix dry ingredients
Whisk together 4 cups all-purpose flour, 1 tablespoon cocoa powder, 1 teaspoon baking soda, and 1 teaspoon salt in a large bowl until evenly combined.
-
Cream butter and sugar
Beat 1 cup softened butter with 2 cups granulated sugar using an electric mixer on medium speed until light and fluffy, about 3-4 minutes.
-
Add eggs and flavorings
Beat in 2 eggs one at a time, mixing well after each addition. Add 1 cup vegetable oil, 2 tablespoons red food coloring, and 3 teaspoons vanilla extract, beating until smooth and evenly colored.
-
Combine wet and dry ingredients
Add the flour mixture to the butter mixture in three additions, alternating with 1 cup buttermilk in two additions, beginning and ending with flour. Mix on low speed just until combined after each addition.
-
Add vinegar reaction
Gently fold in 1 tablespoon white vinegar with a wooden spoon until just incorporated - this will react with the baking soda to help the cake rise.
-
Bake the cakes
Divide batter evenly between prepared pans and smooth tops with a spatula. Bake for 28-32 minutes, until a toothpick inserted in the center comes out with just a few moist crumbs attached.
-
Cool completely
Cool cakes in pans for 10 minutes, then run a knife around edges and turn out onto wire racks. Cool completely to room temperature, about 1 hour, before frosting.
-
Make cream cheese frosting
Beat 14 oz softened cream cheese and remaining 1 cup softened butter with an electric mixer until light and fluffy, about 2 minutes. Gradually beat in remaining 2 cups powdered sugar and remaining vanilla until smooth and spreadable.
-
Assemble and frost
Place one cake layer on serving plate and spread with about 1 cup frosting. Top with second layer and frost top and sides with remaining frosting. Refrigerate for 30 minutes to set before slicing.
Tips
Ensure all ingredients are at room temperature before starting - this is crucial for proper mixing and achieving the cake's signature light texture.
Sift all dry ingredients together to prevent lumps and ensure even distribution of cocoa powder and leavening agents.
Don't overmix the batter once you add the flour - mix just until ingredients are combined to maintain the tender crumb.
Use natural cocoa powder rather than Dutch-processed for the authentic flavor and to help with the natural reddish color development.
Test for doneness with a toothpick inserted in the center - it should come out with just a few moist crumbs attached, not completely clean.
Cool cake layers completely on wire racks before frosting to prevent the cream cheese frosting from melting.
Chill the frosted cake for 30 minutes before serving for cleaner slices and better presentation.
Store leftover cake covered in the refrigerator, but bring to room temperature 15 minutes before serving for best flavor.
The History of Red Velvet Cake
Red Velvet Cake has a fascinating history that dates back to the Victorian era when it was known as a luxury dessert served at upscale hotels and special occasions. The cake's distinctive red color originally came from a natural chemical reaction between cocoa powder and acidic ingredients like buttermilk and vinegar, which would turn the cake a reddish-brown hue.
The modern bright red version became popular during the Great Depression when food coloring companies began marketing their products more aggressively. The famous Waldorf-Astoria Hotel in New York City helped popularize the cake, and it became particularly beloved in the American South, where it remains a staple at celebrations and gatherings.
What Makes Red Velvet Cake Special
Red Velvet Cake is often mistaken for chocolate cake with red food coloring, but it's actually quite different. The cake contains only a small amount of cocoa powder, giving it a subtle chocolate flavor rather than an intense one. The real magic happens with the combination of buttermilk and vinegar, which creates the cake's signature tangy flavor and incredibly tender crumb.
The reaction between the acidic ingredients and cocoa powder also helps create the cake's fine, velvety texture - hence the name "velvet." This unique combination results in a cake that's moist, light, and has a distinctive flavor profile that sets it apart from other desserts.
Perfect Cream Cheese Frosting
Traditional Red Velvet Cake is always paired with cream cheese frosting, and for good reason. The tangy, rich frosting perfectly complements the cake's subtle sweetness and slight acidity. The key to perfect cream cheese frosting is ensuring all ingredients are at room temperature and whipping them until light and fluffy.
The frosting should be thick enough to hold its shape when piped but smooth enough to spread easily. Many bakers prefer to chill the frosting for 15-20 minutes before decorating to achieve the perfect consistency.
Variations and Dietary Adaptations
Vegan Red Velvet Cake
Creating a vegan version is surprisingly simple. Replace eggs with flax eggs (1 tablespoon ground flaxseed mixed with 3 tablespoons water per egg), use plant-based milk with vinegar instead of buttermilk, and substitute vegan butter and cream cheese. The texture remains remarkably similar to the traditional version.
Gluten-Free Option
For gluten-free Red Velvet Cake, substitute all-purpose flour with a high-quality gluten-free flour blend that contains xanthan gum. The key is to not overmix the batter and to ensure your other ingredients (especially cocoa powder and food coloring) are certified gluten-free.
Serving and Presentation Ideas
Red Velvet Cake is stunning when presented as a traditional layer cake with cream cheese frosting between layers and covering the entire cake. For special occasions, consider decorating with fresh berries, chocolate shavings, or piped frosting roses. Individual cupcakes are perfect for parties and easier portion control.
The cake pairs beautifully with vanilla ice cream, fresh strawberries, or a glass of cold milk. For adults, it complements coffee, black tea, or even a glass of dessert wine.
Storage and Make-Ahead Tips
Unfrosted cake layers can be wrapped tightly in plastic wrap and stored at room temperature for up to 2 days, refrigerated for up to 5 days, or frozen for up to 3 months. The frosted cake should be stored in the refrigerator and can last up to 5 days when properly covered.
For best results, bring refrigerated cake to room temperature for 15-20 minutes before serving to allow the flavors to fully develop and the frosting to soften slightly.
Frequently Asked Questions
Why did my cake turn out dense?
Dense Red Velvet Cake usually results from overmixing the batter or using cold ingredients. Always bring eggs, butter, and buttermilk to room temperature before mixing, and fold ingredients together gently.
Can I make this cake without food coloring?
Yes! The original Red Velvet Cake relied on natural cocoa powder for its reddish hue. Use natural cocoa powder (not Dutch-processed) and you'll get a lovely reddish-brown color from the chemical reaction with the acidic ingredients.